Shopping Cart

Your cart is currently empty.

TOP 10 TIPS TO GET YOUR VEHICLE READY FOR WINTER

all-season-vs-winter-tiresOld man winter is on his way and there are some maintenance and preventative tasks that you should do to your vehicle to ensure it’s ready for the cold air … and safe to drive in what could be dicey conditions.

TIP #1: FLUID LEVELS: Check all fluid levels to ensure that all are at the correct level for proper working order. Check your oil, transmission fluid, brake fluid, radiator coolant, and windshield wiper fluid. Consumer Reports suggests using an oil formulated for winter use: “Engine oil thickens when cold, making it harder for the engine to turn over. Check your owner’s manual for the manufacturer’s recommendation, but generally, you should be using a multi-viscosity oil that has a “W” in the viscosity index, signifying that it’s formulated for winter use. Typical formulas that are recommended for modern engines include 5W-20, 5W-30, and 10W-30, which provide good oil flow at low temperatures and can usually be used year-round.”

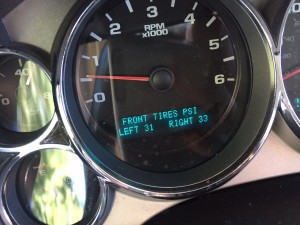
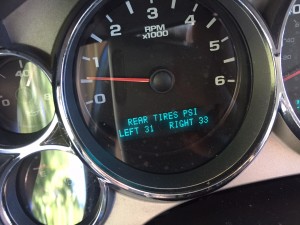
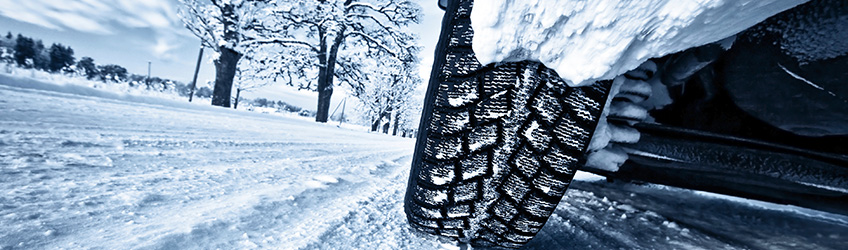
TIP #2: TIRES: Check your tire pressure and make sure they have plenty of tread. Bald tires on slick roads are a bad situation. Do you notice any abnormal wear on your tires, including your spare tire? Check & keep the proper listed amount of tire pressure for your tires at normal wear- you can deflate during snow and Ice situations.

TIP #3: BATTERY: Very cold temperatures can reduce a vehicle’s battery power by up to 50 percent. Have your battery serviced and load-tested to check its ability to hold a charge. If the battery is more than four and-a-half years old, it may be a good idea to replace it. Check your battery for corrosion and/or lose cables. If there is corrosion, you need to loosen and clean them with battery cleaner and a steel wire brush.

TIP #4: BRAKES: Winter conditions can cause debris to freeze on or around your brakes. This can cause you to be unable to safely stop in a winter slip.

TIP #5: KEEP IT FULL: Having a full tank of gas not only helps in the case of bad weather, but it also helps prevent moisture from freezing in the gas lines.

TIP #6: GET A TUNE UP

TIP #7: BE PREPARED: There are numerous sites that provide essential things to keep in your car. Here’s our short list for Winter Emergency Items to put in your trunk now:

  • A flashlight, flares and a first-aid kit
  • Seat belt cutter and window breaker. This one’s $7 on Amazon. Keep this in your glove compartment, not in your trunk, obviously.
  • Make sure that all the proper tire-changing equipment is in the vehicle
  • Jumper cables, a tool kit and tire chains
  • Flares or reflective triangle, so you don’t get hit at the side of the road in the dark.
  • Maps. Yes, the paper kind.
  • A blanket (like the Mylar space blanket), warm clothes, hat and gloves
  • Paper towels
  • A bag of salt or kitty litter for added traction when a tire is stuck
  • A snow brush, ice scraper and snow shovel
  • Extra windshield washer fluid
  • Extra food and bottled water

TIP #8: Change Your Lights – Proactively replace your fog, brake, and tail lights before they burn out. It’s relatively inexpensive and can help you avoid a dangerous situation if you find yourself in poor-visibility conditions.

TIP #9: Antifreeze– Antifreeze protects your engine from freezing in cold weather and it also cuts back on corrosion. It’s important to keep equal parts antifreeze and water in your radiator — a 50:50 ratio is considered the norm and will keep fluids from freezing at temperatures as low as -34 degrees Fahrenheit. Buy pre-mixed bottles of antifreeze and water.

TIP #10: Make Sure Your 4-Wheel Drive Works- Unless you go off-roading all year long, chances are if you own an SUV you don’t use your four-wheel drive (4WD) during the summer. Make sure that everything is working correctly before the winter starts. A functioning system can improve tire traction on snow and ice, decreasing the possibility of getting stuck. 4WD varies depending on the vehicle, so check the owner’s manual for the best environment in which to use it and how to engage the system.

TOP 5: PREVENTATIVE MAINTENANCE FOR YOUR EAGLE LIFT

We cannot stress enough how important it is to use the lift for the proper types of vehicles it is designed to handle. If you overload your lift, or do not do the proper maintenance to maintain your lift, you will encounter problems and your lift will not preform to the standards we recommend. If you want your Eagle lift to last you for many years to come, make sure you read the manual and do proper maintenance. Click here for daily, weekly and monthly maintenance recommendations.

1 – Maintain the proper hydraulic fluid and level needed or required to operate the lift. Eagle’s power units take AW-32 hydraulic fluid. DO NOT USE ATF (Automatic Transmission Fluid). Read this previous blog on selecting the correct oil for your Eagle Lift.

2- Adjust and maintain a proper adjustment on the lift cable at least every 3 months. Over time, the cables stretch and if not adjusted, a cable can jump a pulley or cause the lift to rise unevenly.  Each cable should have about .5” of deflection (should not move more than .5”).  This is true for a two-post or four-post lift.  Adjustments are very simple to do and the steps are specific in the manual provided with your lift. Please look that over for instructions on how to adjust your cables.

3- Keep your chains and chain rollers lubricated to allow for less friction and proper movement. We recommend white lithium grease.  You should do this weekly.

rub blocks
Rub Blocks are located in the corners of the carriage on your lift

4- Apply a thin coat of lubricant on the carriage rub blocks (and part of the carriage that rub blocks touch) to allow less friction and wear as the lift moves up & down the lift with each use. We recommend white lithium grease spray for this as well.

5 – Repair all leaks or damages as soon as possible to prevent any further damage to existing parts and others it might affect being defective. If you need assistance on repairing, or replacing a part, please call our parts department at 800-535-0016.

Crisp Mornings, Pumpkin Spice Lattes and Tire Pressure Lights!

Here in North Carolina we woke up to a surprisingly crisp morning. Fall came in like wrecking ball, as Miley would say. So, I shouldn’t have been surprised to that my tire pressure monitoring light was on. Why does the weather play a role in your tire pressure?

Did you know that hot weather is more likely to may make your tires over inflated and cold weather may cause your tires to be hazardously under-inflated?

Newer cars (mostly after 2000) have a tire pressure monitoring system (TPMS) built in for each wheel that constantly measures the inflation of that tire. You can read an earlier blog about TPMS and see a video on changing tires with them.

tpmslightWhen your tires differ from the recommended inflation pressure, your TPMS will activate and the light will come on, informing you to check the PSI in your tires. If your tire pressure has been set during the hot summer months, the first major cold wave will cause the air to contract inside your tire, lowering the pressure, thus setting off your TPMS.

According to a study conducted by TPMS sensor maker Schrader International Inc., many drivers still can’t identify the tire pressure monitoring system (TPMS) warning symbol on their vehicle’s dashboard. This study also found some other interesting facts about tire pressure, click here to see the results.

The TPMS measures your tires when they become significantly under-inflated. It’s important to check you car’s owners manual to see what is the recommended cold tire inflation PSI. Some vehicles will even tell you what the pressure is instead of just showing the warning light. Like on my Chevy Truck:

There is a relationship between the change in temperature outside and the pressure inside your tires. On mornings like this, where fall is in the air, your tire pressure will become significantly lower. Cars that sit outside all night will be affected more by the colder weather than those kept in a garage. Your tire pressure will decrease about 1 psi for every 10 degrees Fahrenheit the outside air temperature drops. (Likewise, it increases about 1 psi for every 10 degrees when the temperature rises.)

1. Only 15% of car owners properly check their tire pressure. Don’t be one of them. Check your tire pressure monthly. Don’t wait for the light to come on. Carry a tire gauge in your glove box, and check your tires once a month. Do this in the morning, when tires are cold. During this time, make sure all tires are at the PSI indicated in your manual.

2. As you drive, the friction will allow the tires to heat up, increasing the pressure. If you check your tire pressure after driving, you may have an inaccurate high-pressure reading.

According to https://www.accuweather.com, most tires can handle higher pressures resulting from driving and in hot weather, provided they were set at the “correct” pressure when it was cold.

3. If your TPMS light comes on, immediately check your tire inflation. You can also have a dealer or a mechanic check it for you. The light should go off once your tires reach the proper PSI, but check your manual as there may be a reset procedure to follow.

Do Not Ignore The Light

A June 2012 study by the Rubber Manufacturers Association reports that more than 80 percent of vehicles on our highways have at least one under inflated tire, which can reduce safety and handling, raise your fuel consumption, and can wears out the tires faster costing you money.

Cars have warning lights because it’s important. I’m going to repeat that, Cars have warning lights because it’s important. A car is something that needs to be maintained and up-to-date on all maintenance work in order to keep you safe and the car in good condition. Running on under-inflated tires will affect gas mileage and will substantially increase the wear on the tire. The biggest safety issue is that it can result in dangerous handling. Increased friction created while driving on under-inflated tires will cause tires to overheat and increase the risk of a blowout. Remember the Goodyear accidents from under-inflated tires?

So, now that my tires are at a safe pressure …. WELCOME FALL AND WARM COFFEE DRINKS! Have a great Monday!

Chris Wilson joins our maintenance department!

Chris Wilson joins our maintenance department!

chris wilsonMeet the new maintenance technician at Standard Tools. He’s the new favorite person around here because, whew… is he handy! He started off running and has already made vast improvements to our facility and our equipment.

Chris lives in Reidsville, NC with his wife Brandi and his 6-year-old daughter, Hayden. Chris graduated from Rockingham Community College’s Industrial Maintenance and the BLET (Basic Law Enforcement Training) programs.

In his free time, he enjoys spending time with his family. Currently he is excited about his future with Standard Tools and checking into 4-year degree program that can take him even further in his education and career.

Welcome to the team Chris!

Spanish Translation: Mantenimiento de Equipos Neumáticos

This Blog is a Translation of this blog, posted in September 2013.

Con el fin de mantener su negocio corriendo como una máquina bien engrasada … es necesario tener una máquina bien engrasada. Cuando el taller mecánico empieza a tener mucho negocio es natural que se enfoque en las reparaciones de los clientes, tales como radiadores y baterías, y a menudo olvidamos que nuestro propio equipo neumático, ascensores, compresores y líneas de aire necesitan mantenimiento también. Continue reading Spanish Translation: Mantenimiento de Equipos Neumáticos

Car Lift Maintenance: Check it Every Day

I met a gentleman the other day that was 96 years young! He was surprisingly agile and swift on his feet. He had few wrinkles and looked really good for his age! I was really impressed and thought he wasn’t a day past 70. That got me to thinking about ‘maintenance’.  If I exercise, take care of myself, eat right and stress less…. Will that help me to age just as gracefully?

There are Eagle lifts out there that have been doing their job for decades and still run like the day they were installed. They have aged well, with the right maintenance and care.  Do you know how to maintain your lift so it will run like new for many years? Luckily, it’s easier to know how to help your lift age well…. my wrinkles, not so much!

http://www.autolift.orgLIFTS MUST BE MAINTAINED AND INSPECTED REGULARLY TO ENSURE SAFETY.


Perhaps the most important car lift maintenance is to adjust the cables.  Over time, the cables stretch and if not adjusted, a cable can jump a pulley or cause the lift to rise unevenly.  Each cable should have about .5” of deflection (should not move more than .5”).  This is true for a two-post or four-post lift.  Adjustments are very simple to do and the steps are specific in the manual provided with your lift. Please look that over for instructions on how to adjust your cables. Continue reading Car Lift Maintenance: Check it Every Day

Winter Weather and Your Shop Equipment

As we wait for another winter storm to hit, we are planning for snow, rain, ice, sleet and extremely low temperatures. While winter weather is normal, it seems to be a little cruel this year.

From more car accidents to traffic delays and school closing… this type of winter causes a lot of glitches that can delay our normal day-to-day life.

The Midwest, Northeast and Southeast parts of the country have encountered extremely cold temperatures, dropping well below freezing … pass the 0 degree mark.  Weather is out of our control, but protecting your wheel service equipment is not.

Something that you might not consider is that this coldness changes the performance of your equipment. Our wheel service equipment should not be used if the temperature is below 32 degrees. This type of cold increases the risk of the balancer’s computer board or the tire changer’s motor failing. While this is not a common issue, we have seen a rise in these types of problems this year because of the cold weather. If you live in an area where the temperatures are below freezing, you need to protect your equipment and move them to a warmer area to protect the computer boards on the balancer and the motor on the tire changer. Please take the necessary precautions to ensure that your equipment remains in service.

The South Gets Hit in 2014 Winter Weather Storm

Another major inconvenience this weather has caused our customers is shipping delays. We have all seen the pictures of the Atlanta area after the most recent ice storm to hit the south. That ice storm was so severe that it shut down every major road in and around Atlanta. This type of road closure will also cause all shipments, UPS or LTL to delay until the roads are cleared. Anytime you have winter storms that impact different parts of the country, it can delay even the smallest orders.

During the ordering process, communication is key to us. We keep an eye on your shipment and will notify you of any delays that will disrupt the delivery process. You won’t have to wonder where your order is. We do everything we can to deliver orders as promised, but once they leave our dock; it is out of our control. If you have any concerns about the delivery time of your product, please feel free to contact our customer service department for an update.

Now, go get your milk and your bread and get ready to build some snowmen!

Important Lift Maintainance: Lift Cables

Maintaining your lift cables is vital because they are a major part of the lifting process. They ensure that the vehicle is level during the raising or lowering of your lift. Over time these cables will stretch and need to be checked to ensure that they are being used properly. Your cables will stretch with use and will cause the carriages in each post to lift uneven. An easy way to determine if your cables need to be adjusted is to listen to your locks on each post. If your locks are clicking in to position at different times, then you know it is time to adjust each cable. The cables need to be adjusted so that each carriage travels equally throughout the lifting and lowering process. Below are the process for installing and adjusting the cables on our 2-post and 4 post car lifts.

Installing the Cables – 2-Post Lift

1] Manually raise both carriages to rest on the second set of locks from the floor (Fig. 9).

Installing 2 post car lift cables

(Fig. 9)

2] Make sure both carriages are resting on the second set of locks. Carriages must be equal height from floor.

3] Unwrap both cables.  Install 2 nuts on one end of each cable. About an inch (1”) of thread should show through the nuts. Lock these two nuts tightly against each other.  This end will be inside and at the rear of the carriage after routing.

4] With both carriages in place on the second set of locks, route cables as shown (Fig. 10).
 Installing 2 post car lift cables diagram

(Fig. 10)

5] All adjustments should be made at the exposed cable end pointing upward at the front of each carriage. It may be necessary to secure the cable end with a pair of vice grips inside the carriage.

6] Remove the slack from both cables. Before all slack is removed, begin to alternate from one post to the other. First tighten one cable a few turns, before returning to the other post and tightening the second cable an equal number of turns. If done correctly, both cables will tighten up an equal amount, and neither carriage will lift off the locks as they are tightening against one another.

7] Continue to tighten the cables until there is ½” of deflection in the cable about 3 feet above the carriage at the back of each column (Fig 10).

8] Install a second nut on each of the cable ends and lock them tightly against the first nut.

NOTE: Cable tension is very important to the correct and safe operation of your lift.

See the Maintenance Section of this manual for information on maintaining proper cable tensions.

Cable Installation 4-Post Storage/Service Lift

IMPORTANT: Do not damage the chrome cylinder rod during this process. This can ruin the seals of the cylinder resulting in fluid leakage.

1. Inspect cables to ensure proper lengths. All cables should have ID tags showing proper cable lengths.

2. Make sure the cylinder flange plate is installed with pipe receivers facing TOWARDS the cylinder.

3. In order to install cables it is necessary to first extend the hydraulic cylinder. The easiest way to do this is to lay on a creeper under the track and put your feet on the cable plate and push the cylinder rod out to the desired position.  You may also use a come-a-long to pull the rod out as an alternative method.

4. Rout cables according to illustration. (fig. 7)

5. Install flat-washer and nyloc nut on end of cable at top of post. Tighten until several threads show past the nut.

6. Cables should run around the inside of the small rollers (side of the roller furthest from the posts


Tire Equipment Maintenance

In order to keep your business flowing like a well-oiled machine…. you need to have a well-oiled machine. As shops get busy and we tend to focus on customer repairs such as radiators and batteries, we often forget that our own tire equipment, lifts, air compressors and equipment need maintenance as well.

Tire Equipment Maintenance

We get a lot of phone calls from customers about their tire changers not working properly. Leaking water from hoses, cylinders working slow or getting stuck, bead breaker cylinder leaking air or the foot pedal spool valves stick or are leaking. The cause of most of these problems is from water getting into the air lines and into the internal machine components causing seals to dry up or parts to fail.

All of our tire changers come with a regulator assembly that includes a water separator and oiler. If the oiler is low or the water separator is full, the machine will not get proper lubrication.Tire Equipment Regulator diagram

On average an 80-gallon air compressor used to run a shop for 8-hours a-day can produce 3 gallons of water from condensation as a result of compressing air. This water makes it into the air lines and into our air tools and equipment.

Three simple steps to help keep your equipment up and running properly:

  • Drain your air compressor daily or you can install a timed-release valve that will drain your tank hourly.
  • Use a good quality air dryer setup installed after your compressor to keep moisture out of your air lines.
  • Check your oiler assemblies weekly and fill when needed. Most use standard air tool oil. (check your equipment manual).

Like the cars we drive, Shop Equipment has recommended maintenance schedules and recommended fluids. Consult your manual for the recommended maintenance or contact your equipment dealer.

Eagle’s Wheel Balancer Calibration Procedure

Mechanic and Tire ChangerOur service department has gotten a few calls lately asking how to calibrate their Eagle wheel balancer. It is important to read the operation manual before you start using any of Eagle Equipment’s service equipment. Eagle’s wheel balancers do not to be calibrated when you receive them. To allow our customers the ability to begin using their machine right away, our balancers are calibrated before they are shipped.

The main reason a balancer needs to be re-calibrated is because it begins to “chase weight”. “Chasing weight” means the balancer continues to ask for more weight once the first weight is applied. At this point, the machine needs to be calibrated.

Below is the Wheel Balancer Calibration instructions for models: EB-1040, EB-1070 and EB-1090. Follow these steps in order to properly calibrate your Eagle Wheel Balancer. Please call 1-800-336-2776 for any assistance. Continue reading Eagle’s Wheel Balancer Calibration Procedure

Sign up to our newsletter & Receive Savings In Your Inbox

Sign Up

Copyright © 2024 Eagle Equipment. | Ecommerce Shopping Cart Software by Miva, Inc.